SpatialAnalyzer Version 2024.1
Graphical Performance Improvements
SA can handle a lot of data being captured very quickly. Multiple instruments can be measuring at the same time at very high rates, but SA’s graphics were struggling to present all this data effectively to the operator. Efforts have been made in this version to improve visualization both during scanning point clouds and while capturing both 3D and 6D measurements.
CAD Import
Updated Import Formats:
– JT (v10.9), NX – Unigraphics (NX2306), Parasolid (36.0),
– Revit (2024), Solid Edge (2024), SolidWorks (2024)
Feature Inspection
Feature Inspection Controls
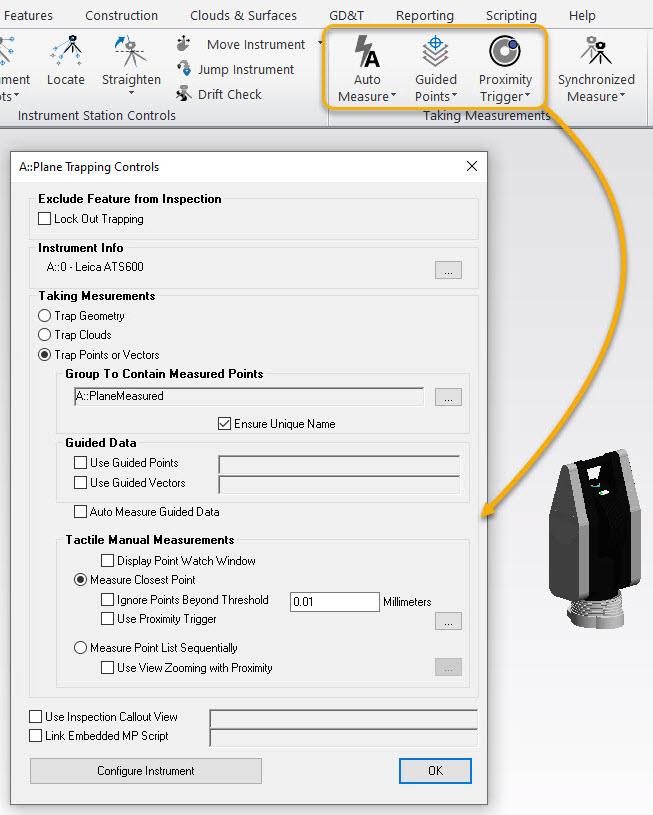
SA 2024.1 introduces the ability to fully template a feature inspection process through incorporating advanced measurement methods. This significantly expands SA’s feature measurement automation capabilities in any license package. These changes include:
- Guide Points or Vectors for Measurement
- Watch Window Display and ability to use View Vooming
- Ability to set a point rejection threshold
- Ability to perform Proximity Triggers automatically
- Ability to simply perform an Auto Measure
To configure a relationship, simply right-click and select the new Trapping Controls option. This opens a dialog offering full control over how to measure the selected feature.
Cloud Based Inspection
Instrument View
The instrument view control has been significantly updated in this version. These changes include:
- A simple On/Off control allowing the dialog to be closed while the mode is still enabled.
- Added option Use Scan Stripe for View Focus. When scanning with this mode enabled, the graphics will track incoming cloud data at a specified Zoom Factor centering the graphics data as you measure it.
- Added the ability to save any of the settings using named configurations.
- Added handling for multiple live instruments. When the operation is activated, a single instrument controls the view.
Direct Cloud Extraction
Updated the Extract Geometry From Clouds search function. When detecting features it will now ensure that only a single geometry object is produced at the same origin, orientation, and size. Multiple searches of the same cloud region will no longer produce redundant geometry results.
Meshing
SA’s meshing tools are expanded in this release. The prior “Extended Parameter” meshing option has been replaced with a new meshing service. This new extended capability is included as an extension of the General Mesh dialog:
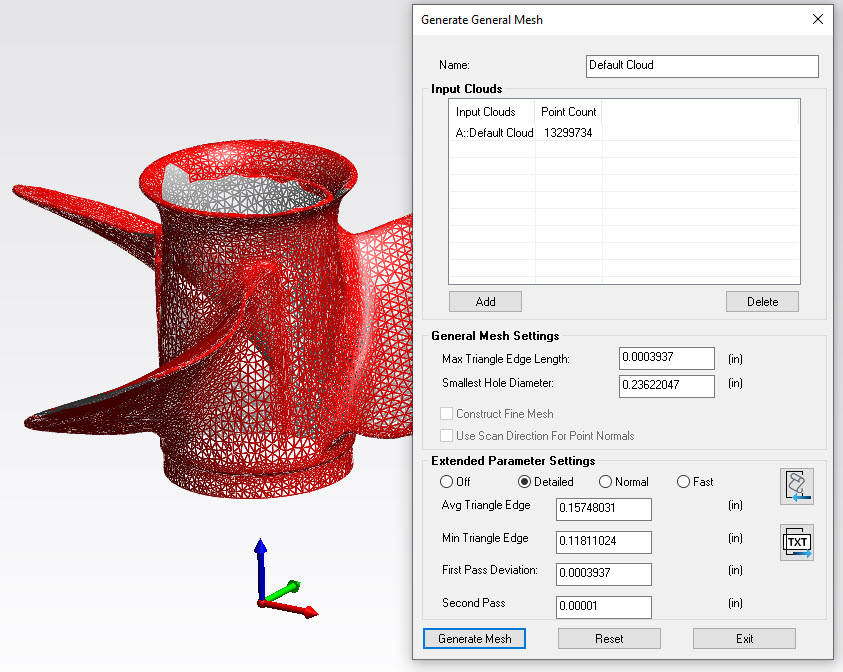
This new tool offers 3 presets “Detailed”, “Normal” and “Fast” as well as direct access to 4 additional core parameters. It also offers export and import capability enabling access to all settings and the direct use of pre-configured settings based on a JSON file.
Relationship Fitting
The optimization process for relationship fitting now includes an additional feature update. Dependent relationships can now drive the fit process. In other words, this means that dynamic intersections between features can be used directly in the fit process.
GD&T Improvements
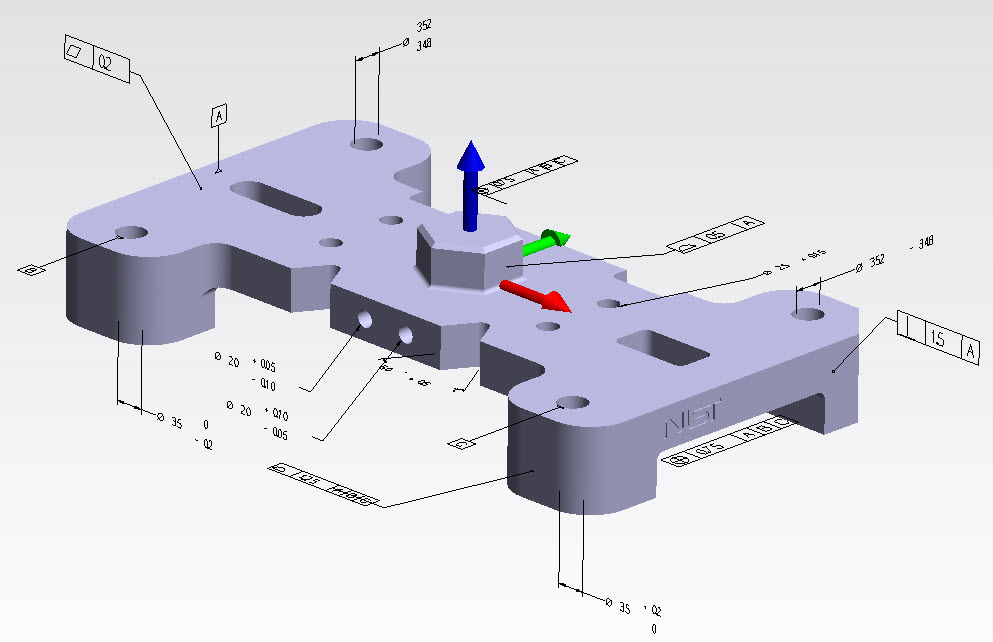
Import Annotation Import with Step (.Stp) Files
Added semantic annotation parsing to support the importing STP files.This represents a significant improvement in standard format annotation import capability and includes debugging tools to identify issues in CAD file annotation problems.
Simultaneous Evaluations
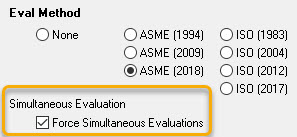
A significant effort went toward supporting the ASME standard default requirement for Simultaneous Evaluations. This version offers a new GD&T option to enforce this requirement. When enabled, Profile and Position checks with a common datum reference frame will be evaluated simultaneously.
Manual simultaneous evaluations for a particular datum frame can also be performed and MP support in now available for all controls..
GD&T Reporting
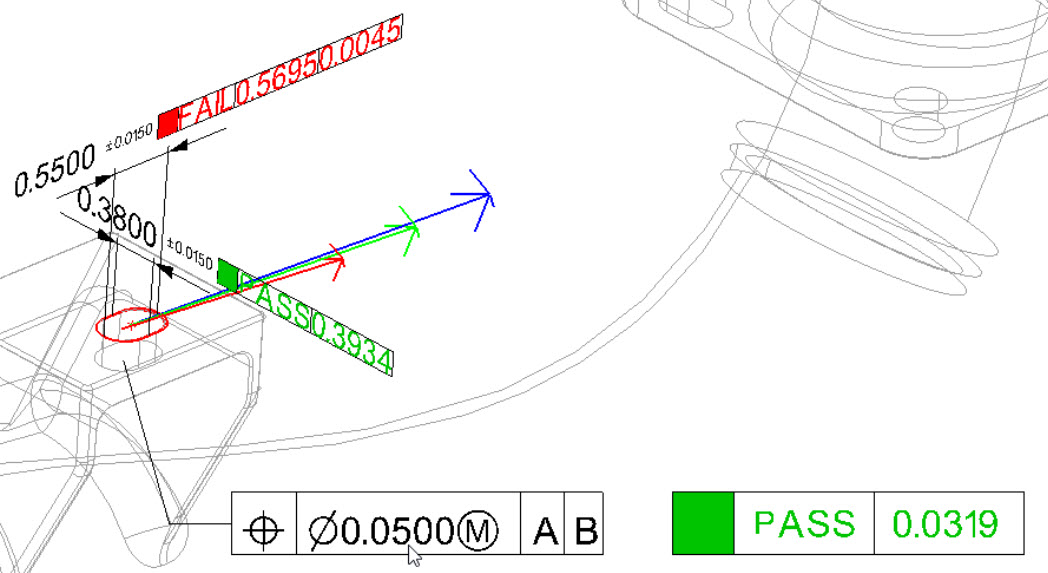
Added graphical vector display to feature checks on slots, similar to those for circle features. This includes 3 points to help identify both position and rotational deviations and their directions.
Reporting
Trifoil Vectors
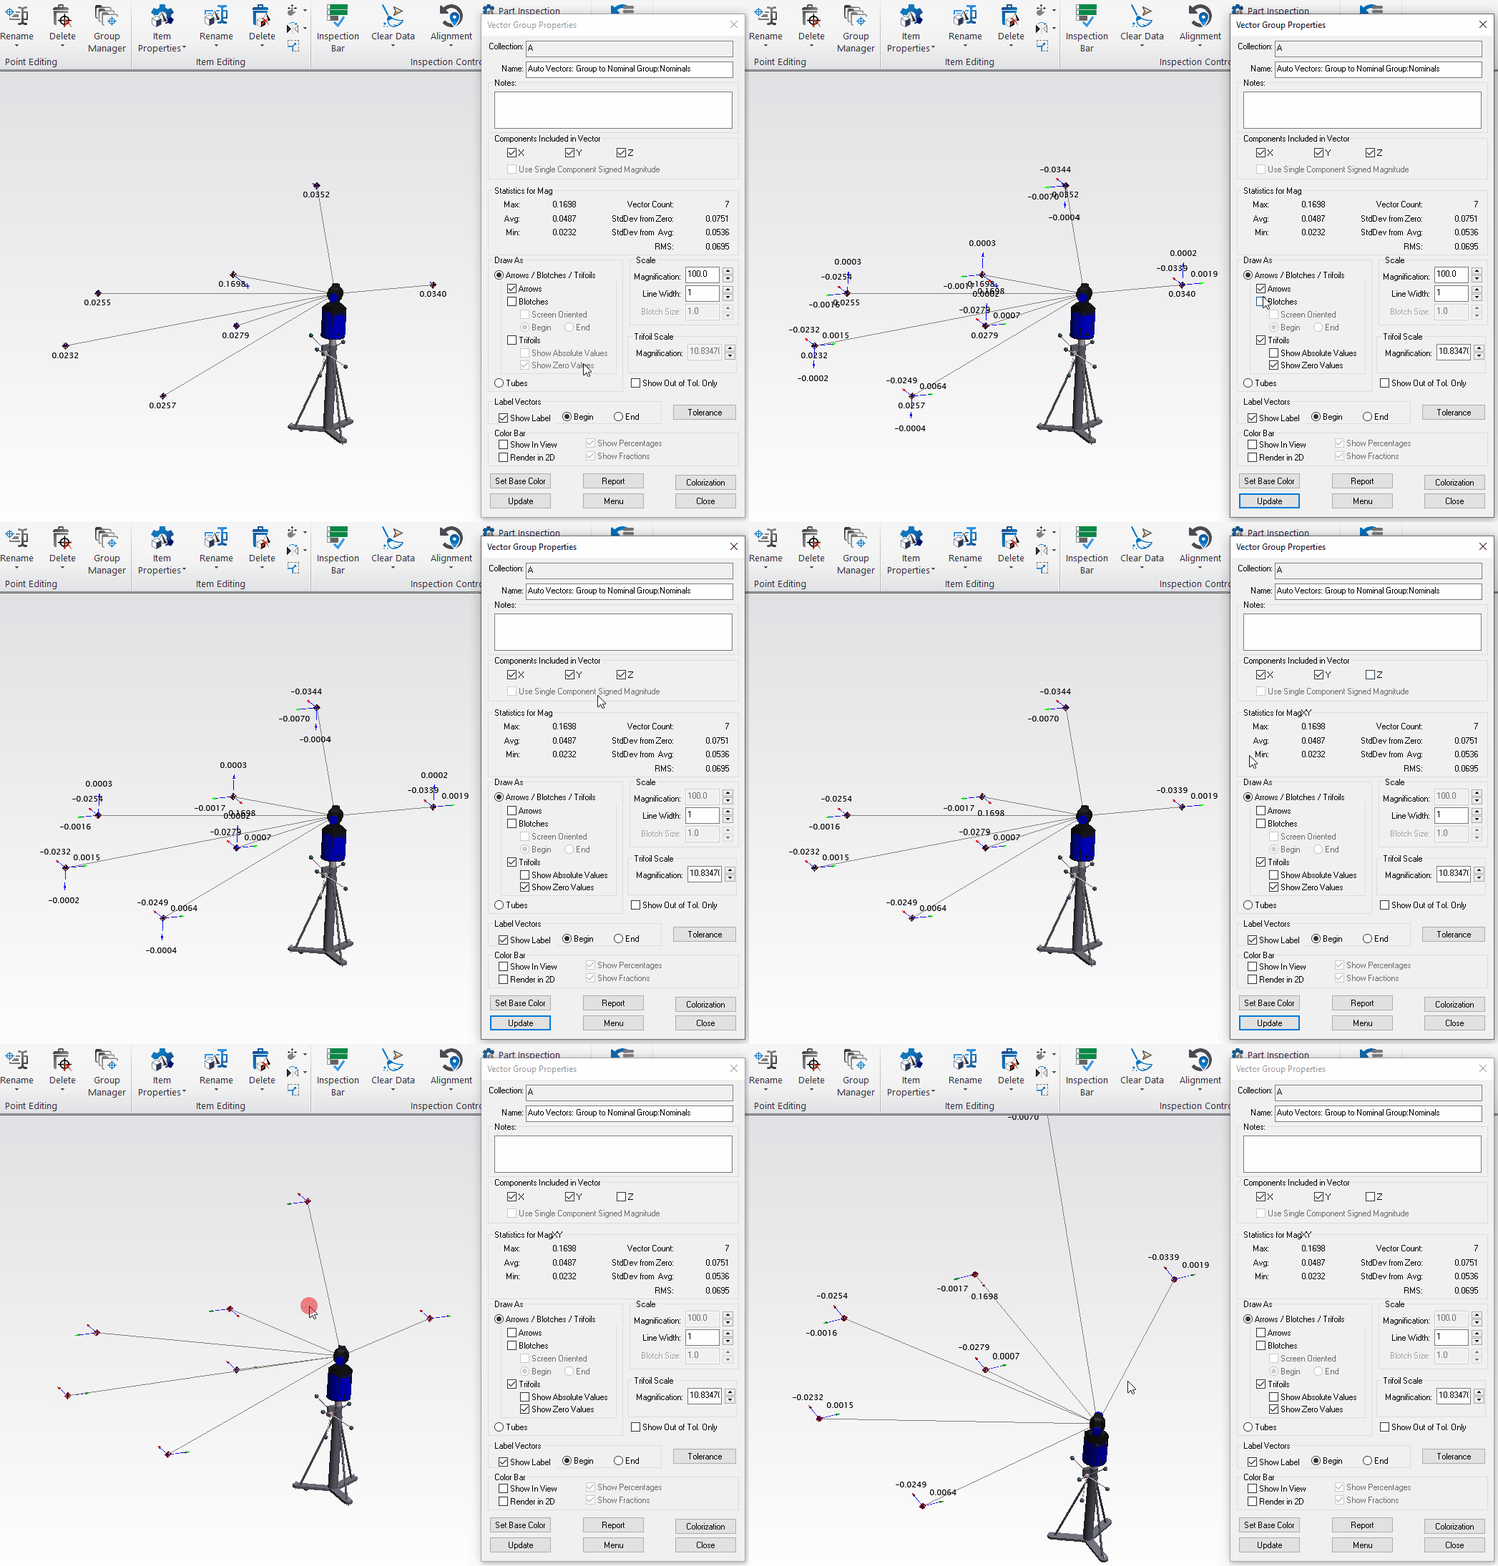
Added a “Trifoil” vector group display mode for vectors. Much like a small frame, this deviation display shows the direction of the deviation components in the working frame and is ideally suited for large construction jobs where relative scaling of vectors is difficult.
Metrology Reporting Connection
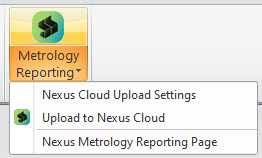
SA now offers the ability for Nexus users to directly connect and share data with Hexagon Metrology Reporting. The connection control is on the Reporting tab, making it easy to upload your job for shared visualization and analysis.
Part Information Form
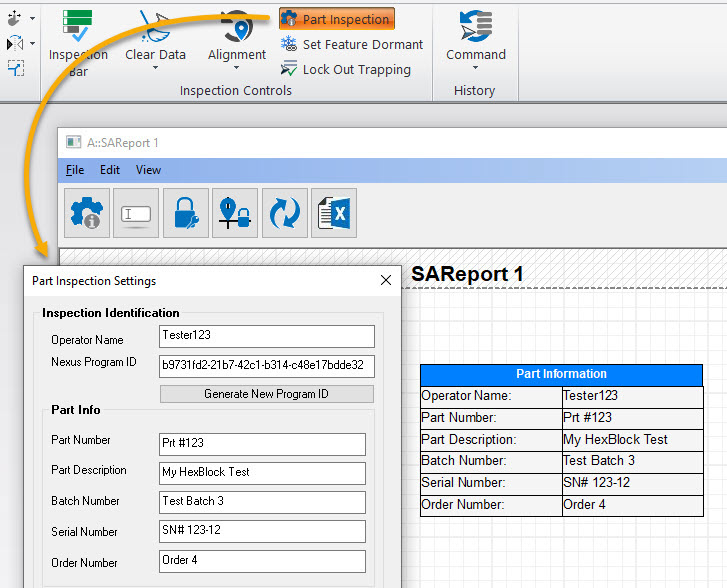
On the Home Tab of the ribbon menu is a Part Inspection button which now offers control over basic part information including Operator Name, Part Number, Part Description, Batch Number, Serial Number, and Order Number. These values are automatically used for SPC analysis by Q-DAS or by Nexus Metrology Reporting uploads.
These same values are also automatically set as reporting tags that can be used within any table in an SA report and will updated dynamically if the operator changes these values.
New License Format
This version introduces support for a new licensing strategy, the Hexagon Unified Licenses Library (HULL). SA can now connect to the Hexagon License Manager (HLM) application and use licenses issued through it. This application has not yet been released but promises to offer both cloud and local network licensing options, both simplifying and broadening licensing options for all Hexagon software.
Please contact Support for more details.
Instrument Updates
All Laser Trackers
Added Wait for Target option which facilitates single operator measurement operations with a reflector, such as Drift Check and Measure Nominal Points. If you use the Measure Multiple button, the tracker can now point at a target and wait. When you catch the beam it will start a “Wait for Stable” mode, and as soon as you measure it will point you to the next target.
New Level Indicator
A new Level Indicator has been to the tracker interface to help identify when a level compensation such as Orient to Gravity (OTG) or Virtual Level are enabled. This status can have important implications and is now clearly indicated.
Hexagon RA8 Arms
Improved button operations to facility switching from probing to scanning. You can now use a long hold on the toggle button to switch between modes on the arm toolbar.
Laser Projectors
Added Projection Filters within the LAP interface.
MP/SDK Scripting Updates
New MP Commands
- Construct Perimeters from Surface Face List. Enables a set of perimeters to be built from a list of surface faces and returns both bounding and exclusion perimeters.
- Create Point Uncertainty Cloud Point Sets. Facilitates creation of uncertainty clouds as usable point locations for further analysis.
- Export Event Ref List. Offers a means to export events to a *.csv file for processing.
- Get Geom Relationship Criteria Name List. Offers an option to build a list of criteria names using the name index and reporting order.
- Import Polyworks File. Offers an option to import a Polyworks File.
- Make Surface Face List from Surfaces. Offers an option to build a list of surface faces from a selected surface.
- Set Cylinder Properties. Offers an option to directly edit the properties of an existing cylinder.
- Set Global Force Simultaneous Evaluation.Set Global Force Simultaneous Evaluation. This command is used to modify the option within the Users Options>Analysis>GD&T options.
- Set Point Weights From Uncertainties. Offers an option to build a set of points with adjusted weighting using a selection of normalization modes.
- Show/Hide Inspection Bar.This command off ers the ability to display the standalone Inspection bar instead of the toolkit.
- Terminate All Running MPs.Off ers the ability to stop any MP operation in any job file at one time.
Instrument Specific Commands:
- Align Laser Projector. This command will initiate the manual alignment procedure using the referenced points.
- Edit Scan Perimeter Profile. Currently only supported for the Hexagon ATS600 tracker, this command offers the ability to directly edit scan regions saved in a measurement profile.
- Export Instrument History to XML File. This command provides an option to export the instrument history as needed.
- Multi Measurement Initiate. Offers a means to send a start measurement command to multiple instruments at the same time (note that synchronization still depends on the speed of the instrument response).
- Multi Measurement Stop. Works with the Multi Measure Initiate command to off er a handy way to stop operations for multiple instruments at one time.
Updated Commands
- Added an argument for a list of exclusion perimeters to the Scan with Perimeter command
- Added arguments to support trifoil vector group display mode to both Get and Set Vector Group Display Attributes
- Added an option for forcing moved observations to become active for Move Measurement Observation command.
- Added optional parameter within Generate General Mesh to reference a JSON file, used as an input to the new meshing engine.
- Added graphics settings to Get Cylinder Properties.
- Added “Date” and “Time” output arguments to Get i-th Event from Event Ref List (Iterator).
- Added High / Low Warning arguments to Get/Set Vector Group Display Attributes.
- Added simultaneous evaluations controls to Evaluate Feature Check(s) options.
- Added “Apply Feature Check Transform?”” argument to Datum Alignment options.
Many minor instrument updates and instrument operational checks have also been added…see read me for details.
SpatialAnalyzer (SA) is a suite of 3D measurement and analysis software developed by New River Kinematics for complex industrial measurements and analyses.SA introduces a 3D view environment to measurement software and has become the industry standard for large scale measurements using portable measuring instruments.SA software is a standard companion for a wide range of industries, from shipbuilding and civil engineering to aerospace and nuclear energy. SA software is a standard package in many industries, from shipbuilding and civil engineering to the aerospace industry and nuclear power. It is an ISO traceable measurement software. The software is easy to use, freely configurable, and has a secondary development platform.SA provides simple communication ports for a wide range of industrial measurement hardware (Leica, FARO, SMX, and API), e.g., various laser trackers have the same user port interface.SA’s open system architecture allows any number of ports to be connected via TCP/IP. The open system architecture of SA allows any number of ports to be connected via TCP/IP. These ports can run simultaneously on every computer in the network.
The SA software’s graphical user interface allows opening CAD files (e.g. CATIA), converting them to ISO STEP format (or any other industry standard format), and then performing all the necessary measurements and analyses – including (GD&T). Accuracy and measurement report pages are matched to the web page, which makes it easy to view and transfer measurement results.
System Features:
– 3D graphical working environment for ease of operation
– Up to 100+ instrument interfaces in multiple languages
– Unified user interface for the same type of measurement instrument
– Any number of different instrument types can be measured simultaneously.
– Ability to handle multi-instrument station leveling (unique USMN feature)
– Dynamic reporting with customizable report templates
– Full support for GD&T rapid testing
– Robots can be calibrated
– Automated measurement, analysis, logging and backup
– Real-time 3D and 6D variable measurements
– SA Software Development Kit – SDK
SA Measurement Interface: The SA Instrument Interface is an application interface for a variety of different measurement instruments, used for instrument connection, configuration, control and data acquisition. A common measurement interface for the same type of measurement instrument allows the operator to select the measurement system to be used for the corresponding measurement task. The interface is used for the network connection between the instrument and the SA. Since the connection to the SA is made via (TCP/IP), any number of interfaces can be run synchronously from any computer in the network.
SA Relational Matching: a new functionally oriented spatial transformation through freely defined relations.
– Traditional optimization – point-to-point, point-to-point
– Relational optimization – point-to-point, point-to-object, object-to-object, set-to-object, coordinate system-to-coordinate system, etc.
– Relational transformation saves time by reducing the preparation and setup process.
– Users can evaluate each relationship individually
SA USMN: Unified Spatial Measurement Network (USMN), solving multi-instrument, multi-station uncertainty problems.
– Different instruments and measurement points can have different weights
– Consider instrument uncertainty
– DOF customization
– Scale Bars can be added
– Calculate point uncertainty
– Simulation of measurement tasks
Transformation Tracking: extends the possibility of synchronizing measurements with 6D real-time operation.
– Trans Track can use data from different measurement systems, e.g. during real-time assembly of the device
– All SA transformations can be called up.
– 6D real-time calculations
Contact email for obtaining software installation package: gosoftvip@163.com The resources are sourced from the internet, and this introduction is for learning purposes. If there is any infringement, please contact us for deletion!
For more info write me
Email : gosoftvip@163.com
telegram : @sacyou888
